How to Convert an NRI Account to a Resident Savings Account
Every year, many Non-Resident Indians (NRIs) return to India - whether for family, career changes, or retirement. Returning to India stirs excitement and happiness. If you're an NRI returning to India, converting your NRI bank accounts is not just a formality - it’s a legal must. Once your status changes, you need to change your account type from your NRE/NRO account to a resident savings account.
This guide explains how to do that, the documents you need, expected timelines, and key tax or compliance points.
Why Conversion Matters for Returning NRIs?
One of the most important financial tasks to handle after coming back is converting your NRI bank accounts into resident accounts. As per RBI guidelines and FEMA regulations, you must re-designate your NRE or NRO accounts once your residency status changes. Failing to do this can lead to compliance issues, frozen accounts, or trouble with income tax filing.
Apart from staying compliant, conversion brings several practical benefits. It gives you access to domestic debit cards, resident interest rates, and tax treatment aligned with Indian laws. If you have funds in foreign currency, you can also choose to transfer them to an RFC (Resident Foreign Currency) account.
How to Convert NRE/NRO Accounts to Resident Savings
The steps to convert to a resident account are quite clear and straightforward. Here is the breakdown of the process:
1. Notify your bank of the status change:
The very first thing you need to do is inform your bank that your residency status has changed from NRI to Resident Indian. Banks require this update to comply with RBI guidelines. You can notify them by:
- Visiting the branch
- Sending an email
- Even using online banking.
2. Fill out conversion forms
Once you’ve informed your bank, you’ll need to fill out a Resident Account Conversion Form. This form is your formal request to convert your existing NRE or NRO account into a resident savings account.
For example, HDFC Bank provides a specific "Resident Savings Account Opening Form," which must be signed by all account holders.
3. Provide required documents
Along with the form, you’ll need to submit supporting KYC documents to update your identity and address proof as a resident. We will discuss in detail the documents you should have in handy to convert an NRE/NRO account to a Resident savings account in the next section.
4. Submit documents to the bank:
Once your forms and documents are ready, submit them to the bank. If you’re in India, you can visit the branch and hand them over (take originals for verification).
Some banks also allow you to courier documents from abroad. For example, ICICI Bank may even allow online submission of the request through net banking.
5. Account Redesignation Process
After you’ve submitted everything, the bank will process your request. They will change your account type from NRE/NRO account to a resident savings account. The account number remains the same in this conversion. Your internet banking login and existing chequebook generally continue as is, just the account type and status change from non-resident to resident.
6. New Resident Account Features
Once conversion is done, the account is treated like any regular savings account. The bank will issue you a new domestic debit card. (Your old NRI debit card might be cancelled upon conversion.) Also, the interest on the account will now be subject to regular taxation and TDS rules applicable to residents, not the NRI TDS rates of 30%.
7. Confirmation On Conversion of NRI Account
The bank will notify you (via email/SMS, or post) when the conversion is completed. At this point, you can resume normal transactions. Make a note that most banks do not allow transactions during the interim conversion process. Once converted, you can operate the account freely.
Documents required for converting an NRI Account to a Resident Account
Here’s a detailed list of documents and what you need to look out for in the document submission for the conversion:
Account Conversion Form:
It is also called “Resident Account Opening Form” or “Re-designation Form”. All account holders must sign it. This is essentially a request to convert the account status.
Declaration of Status Change:
This is a written declaration stating that you have moved back to India and request the change of status from Non-Resident to Resident
Note: Some banks include this as a checkbox or section within the account conversion form.
Proof of Identity:
Such as a copy of your passport with relevant pages showing your return, or Indian Aadhaar card, or OCI card if applicable.
Proof of Indian Address:
Utility bill, Indian driver’s license, voter ID, or rental agreement.The documents should be valid and as per the bank’s accepted list for residents.
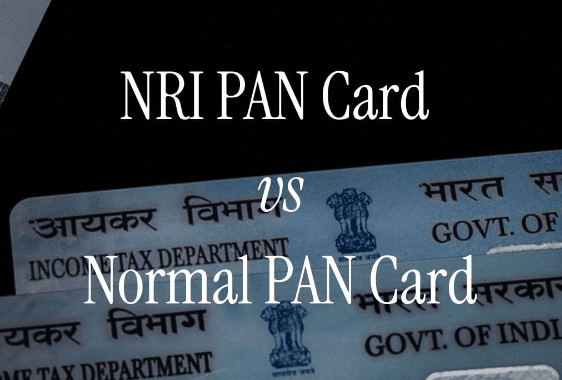
PAN Card:
Since you are now a resident for tax purposes, a PAN card is important. Submit a self-attested copy of your PAN. If you don’t have a PAN yet, suppose you are an NRI without a PAN, you can submit Form 60 temporarily.
Applying for a PAN card becomes a must when you move back to India. Banks like HDFC list “PAN card copy (mandatory)” as part of the conversion documents.
You can read this blog to know more about the NRI Pan Card vs the Normal Pan Card
FATCA/CRS self-declaration:
You would have filed FATCA/CRS declarations before regarding foreign tax residency. Now that you're a resident, you will have to update this. Many banks include an “Extended KYC – FATCA/CRS declaration” form that you must sign, confirming your status as a Resident, not reportable under foreign accounts. This ensures compliance with global reporting norms.
This is only applicable for NRIs who were previously based out of US or Canada.
Annexure or Joint Holder Undertaking:
If your NRI account has joint holders who are still abroad, banks may require an undertaking. For instance, HDFC Bank requires an “undertaking from the NRI joint holder” if a joint holder remains NRI while the primary becomes resident. This basically says the joint holder consents to the account being operated as a resident account.
Note: If you are a second holder on someone else’s NRI account, you should fill out an Annexure form to update your status in that relationship, too.
Any Other Bank-Specific Forms:
Some banks might have additional forms, like a fresh account opening form, treating it like a new account in their system. For example, the State Bank of India (SBI) provides a standard request letter format to convert NRI accounts, which can be downloaded and submitted. Please take a careful look at the required documents, as they can vary from bank to bank.
Note: All documents should be self-attested and may need to be shown in original for verification. If you are not physically present in India, you should get copies notarised or attested by an Indian embassy/consulate or an acceptable authority abroad.
Timeline and What to Expect During the Conversion
The timeline can vary bank to bank, but generally it’s a matter of days or weeks. Here is what you can expect during the conversion process.
Processing Time:
After you submit the conversion request and documents, banks take about 5-10 working days to complete the process. Some banks can be faster with this process, while others can quote up to 10 to 12 business days.
For example, ICICI Bank’s conversion process (in the context of the resident to NRO) takes 12 working days. Based on our research, many users have reported a 1-week timeline for NRI to resident account conversion.
Account Access During Conversion:
Be prepared for the limited access to your account during this conversion process.
Many banks temporarily freeze transactions on the account until it’s converted. This means you might not be able to withdraw or deposit using that account for a short period.
Ensure you have alternate funds ready for any expenses during the NRI-to-resident account conversion.
Account Number and Cheques:
In most cases, your account number remains unchanged after conversion. If you have any auto debit transactions or post-dated cheques linked to your NRE/NRO bank account, they will continue without any issue. The only thing that will change is the account type to “Resident” in the bank's system.
Debit Card and Net Banking:
Your debit/ATM card issued for the NRE/NRO account will be deactivated, and a new resident debit/ATM card will be issued. Internet banking login will remain the same. On the website, instead of NRI services, resident services will appear.
Interest and Tax Deduction:
Once the account is resident, any interest earned is subject to TDS. It is like any other normal savings account, 10% if PAN is provided, or 20% if not, as per prevailing rates.
Foreign Currency Funds (RFC Option)
If you previously had foreign currency in your NRE/FCNR accounts, the bank will ask for your preference, whether you want to convert it to INR or transfer it to an RFC (Resident Foreign Currency) account.
An RFC account is useful if you want to keep money in a foreign currency even after becoming a resident.
Common Mistakes which NRIs should avoid
Procrastinating the Conversion:
A big mistake is delaying notifying the bank. Some people continue using their NRE/NRO accounts as if nothing has changed. This is a compliance risk - remember, FEMA mandates immediate conversion upon your return
Not Redesignating Fixed Deposits:
If you have NRE or NRO FDs, they often require separate instructions to convert. A mistake is assuming they’ll automatically convert on their own. As per RBI rules, NRE FDs should be re-designated as resident FDs immediately when the status changes.
Forgetting Joint Accounts:
If you were a joint holder on someone else’s account (or had a joint NRI account), failing to update those is an oversight. For instance, if you and your spouse had a joint NRE account, and you returned but they are still abroad, the bank needs an undertaking to continue the account.
Mishandling Foreign Assets/Accounts:
Some NRIs rush to close their foreign bank accounts or sell overseas assets, thinking they must do so. In reality, you are allowed to keep foreign bank accounts and assets as a resident
By being aware of these common mistakes, you can ensure a smooth account conversion and avoid any compliance issues.

Comments
Your comment has been submitted